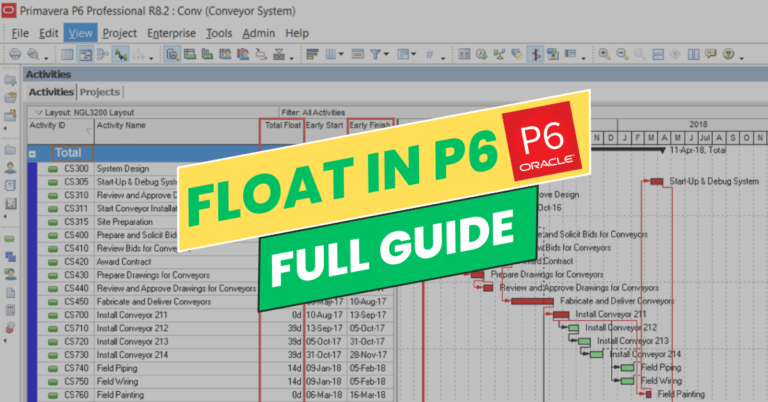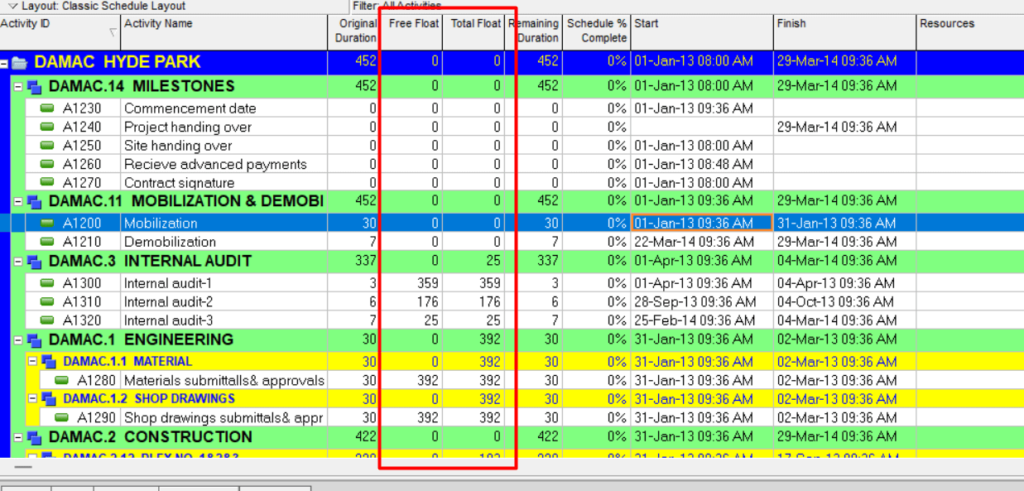
How to show floats in Primavera P6
Float values are stored in two columns, one for total float and another one for free float. They are now hidden in P6 by default and you may have to do some steps to show these two columns. Follow these steps to show them :
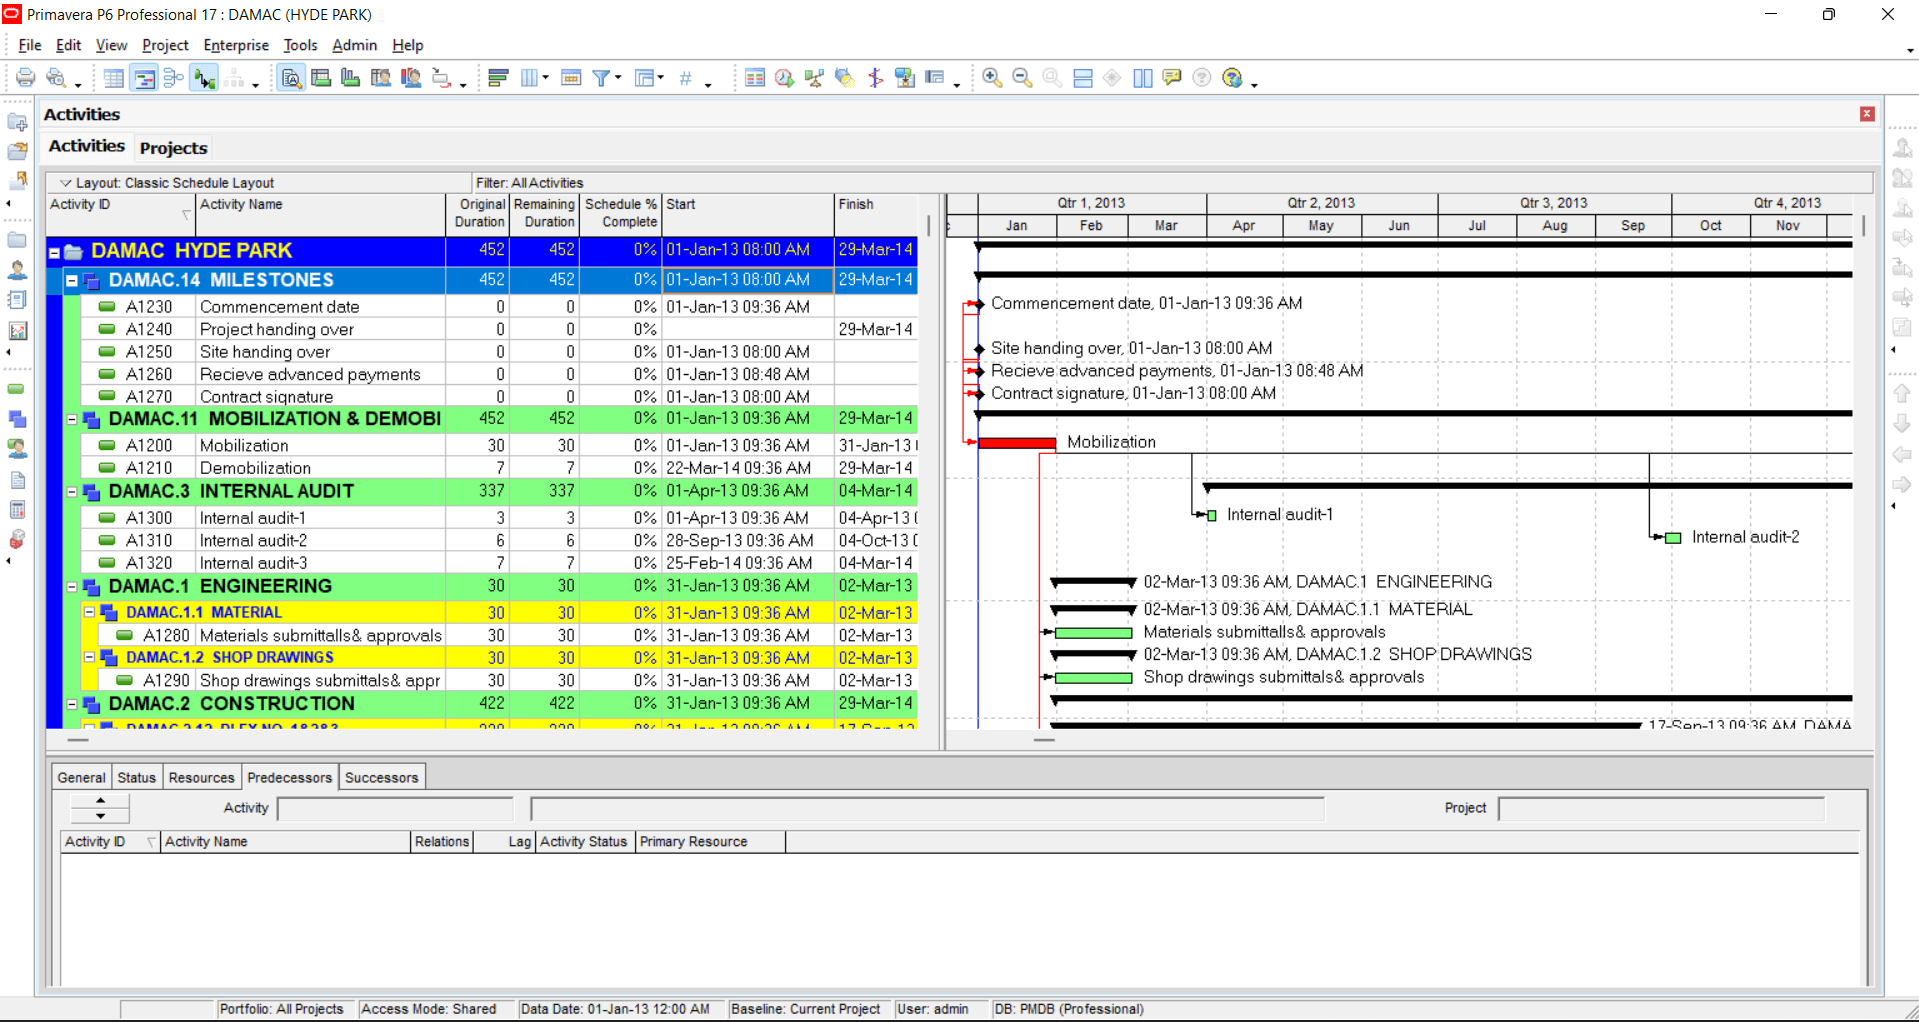
1- Open your current Schedule
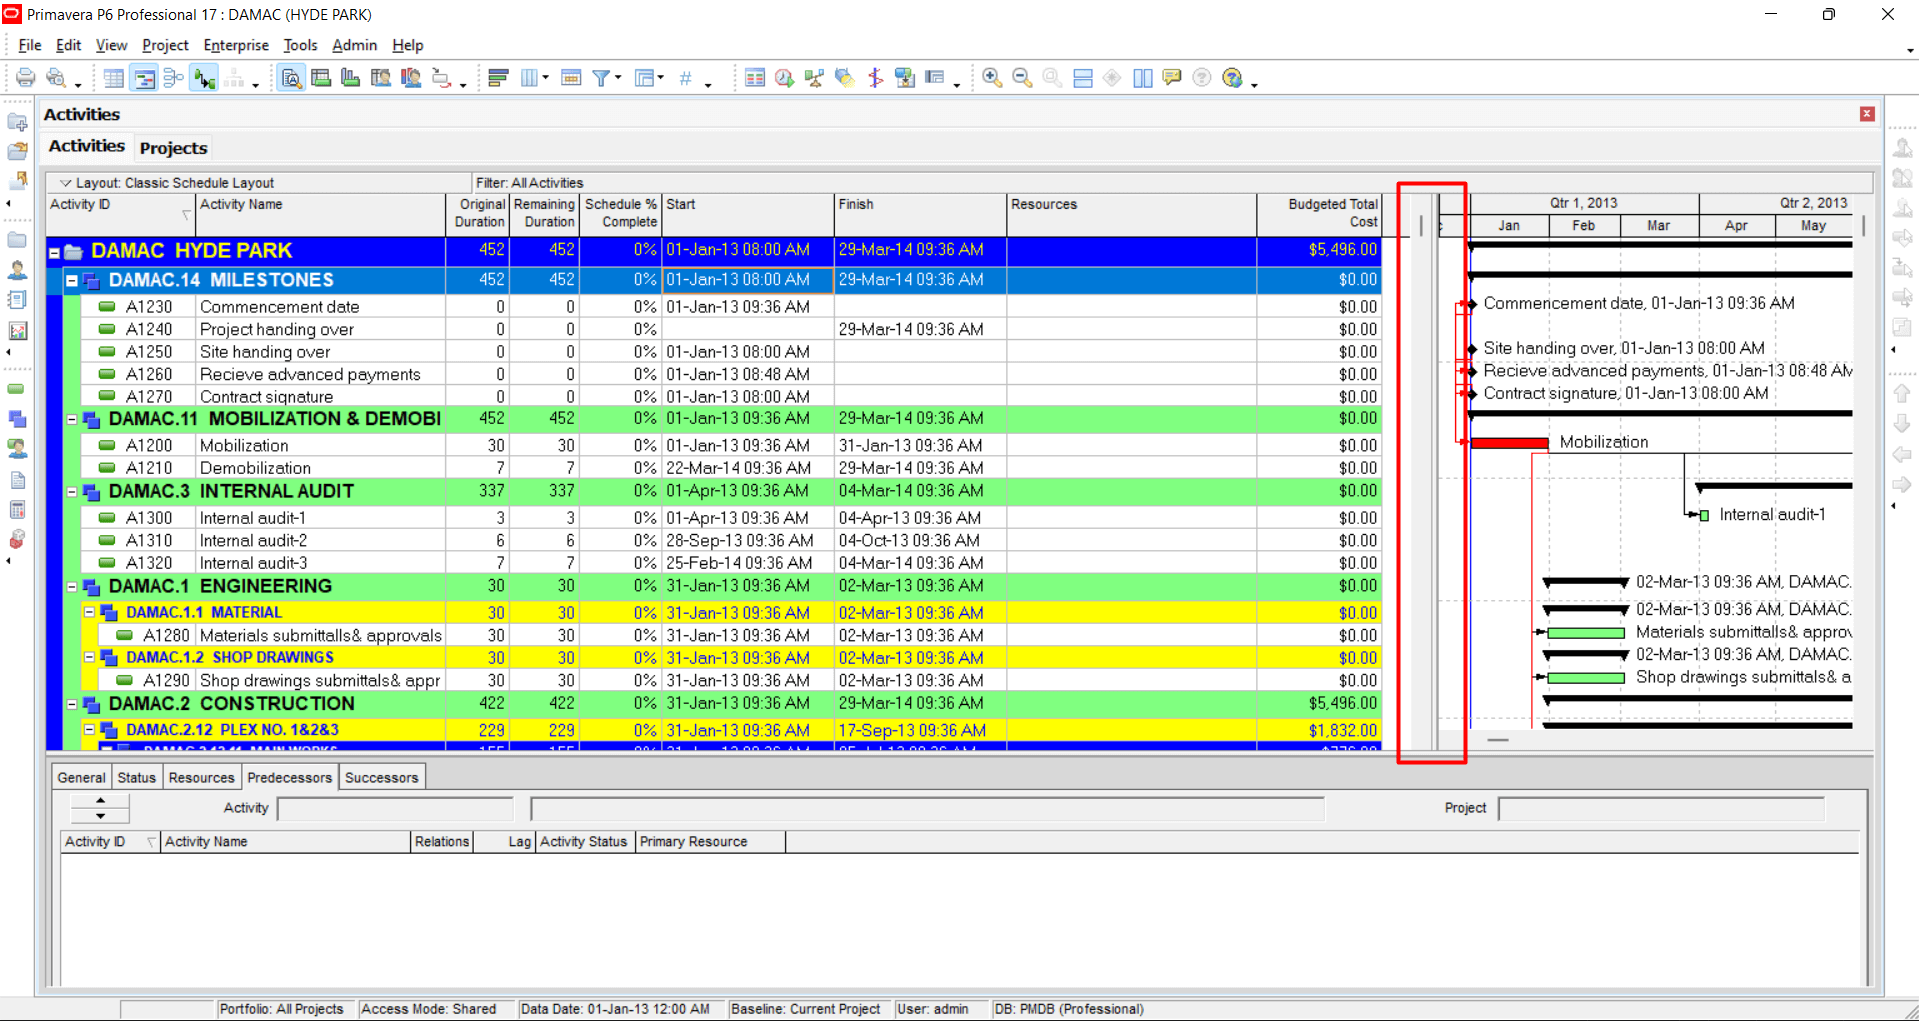
Open your schedule with the layout you last created and check first if the float columns are not there already but hidden behind the Gantt chart
2- Show all columns
Click on the line between your columns and Gantt chart and slide it to the right to show all columns there.
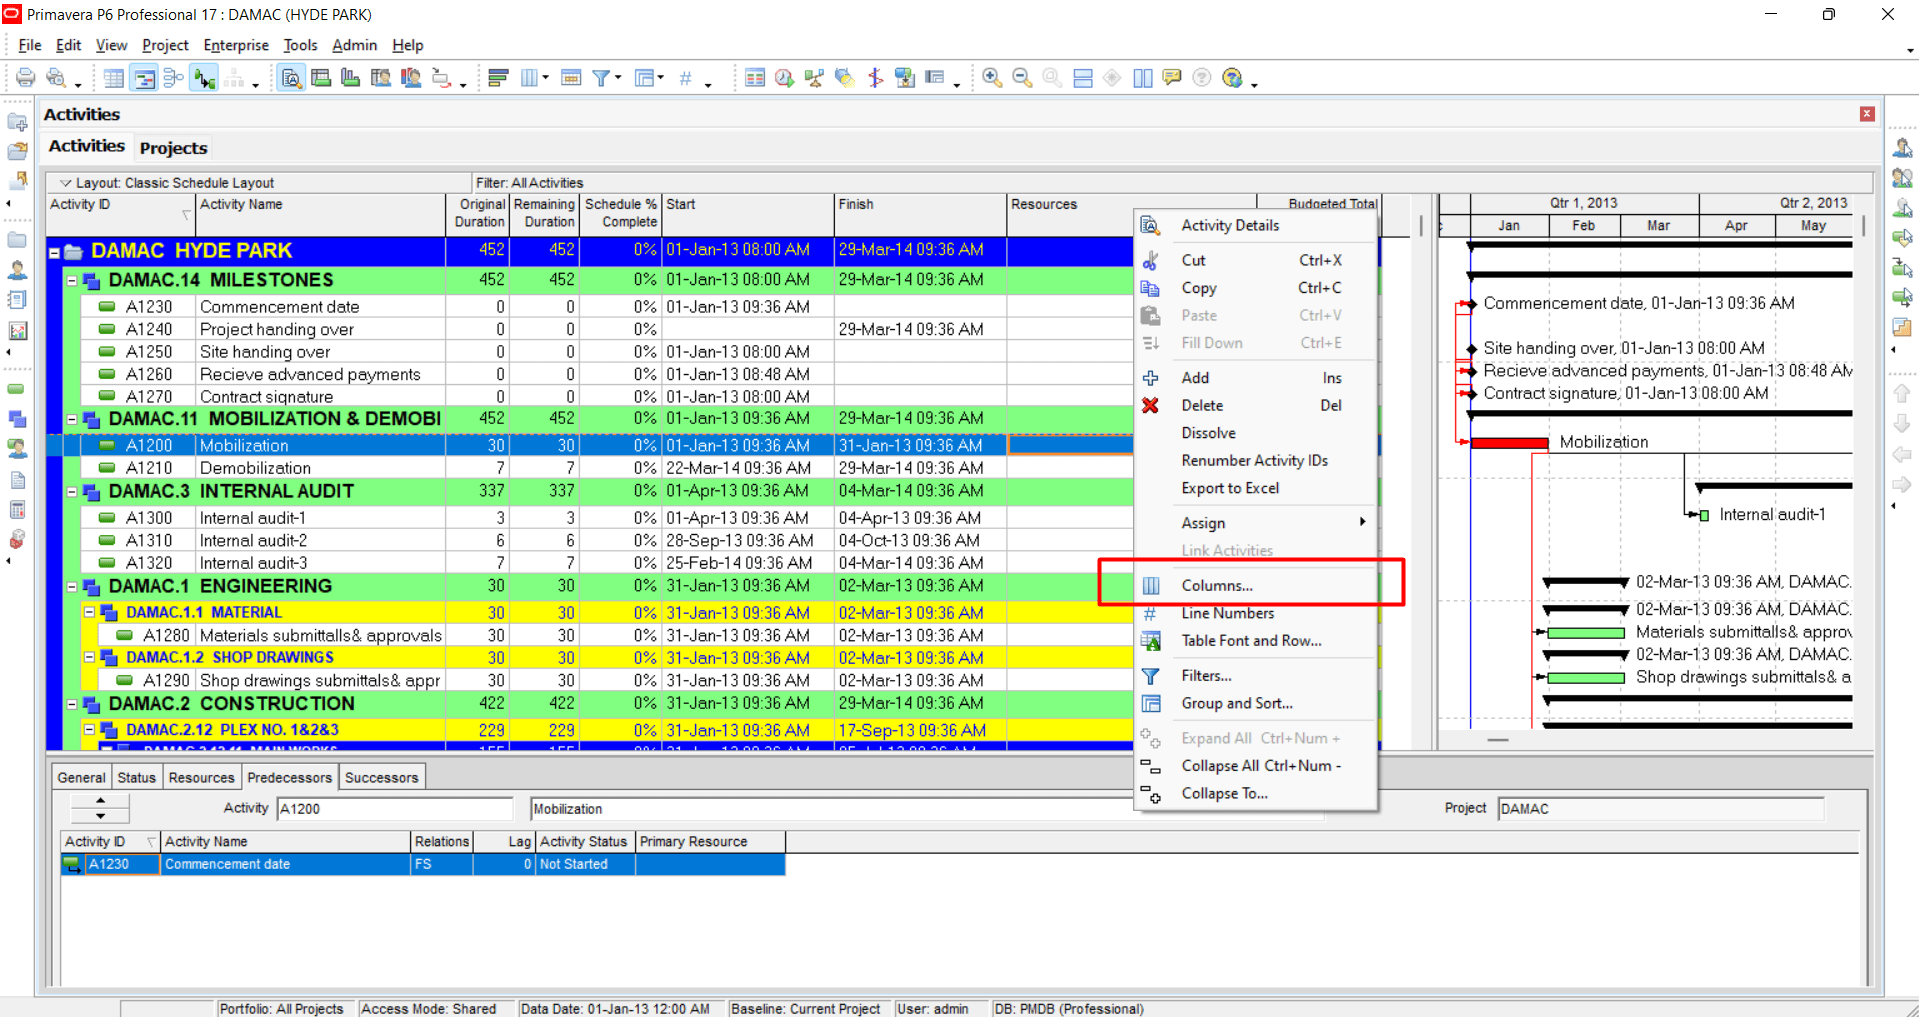
3- As we don’t see any columns called total float or free float, we have to show them
Right-click anywhere on the schedule and choose Columns.
You can also click on the columns icon from the horizontal toolbar above your schedule.
3- From the Available list on your left, search for the Durations and Double click on it or just click on the plus symbol.

4- Search for free float and total float and double-click on them to move them to the right where you can find all the columns which will show on your working area.
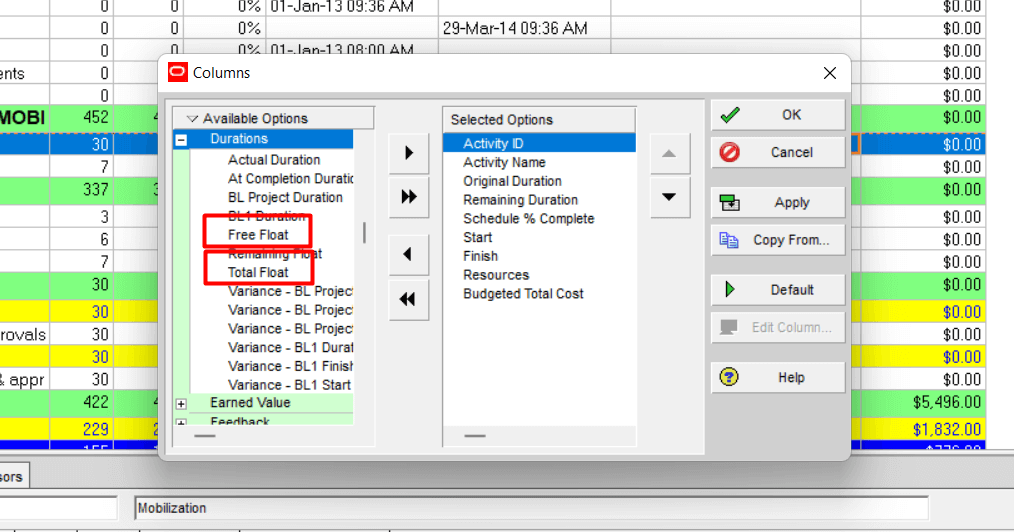
5- After you move them to the right by double-clicking them, you can move them up or down to change the arrangement of the columns. After moving them to the place you want them to be in, click ok.
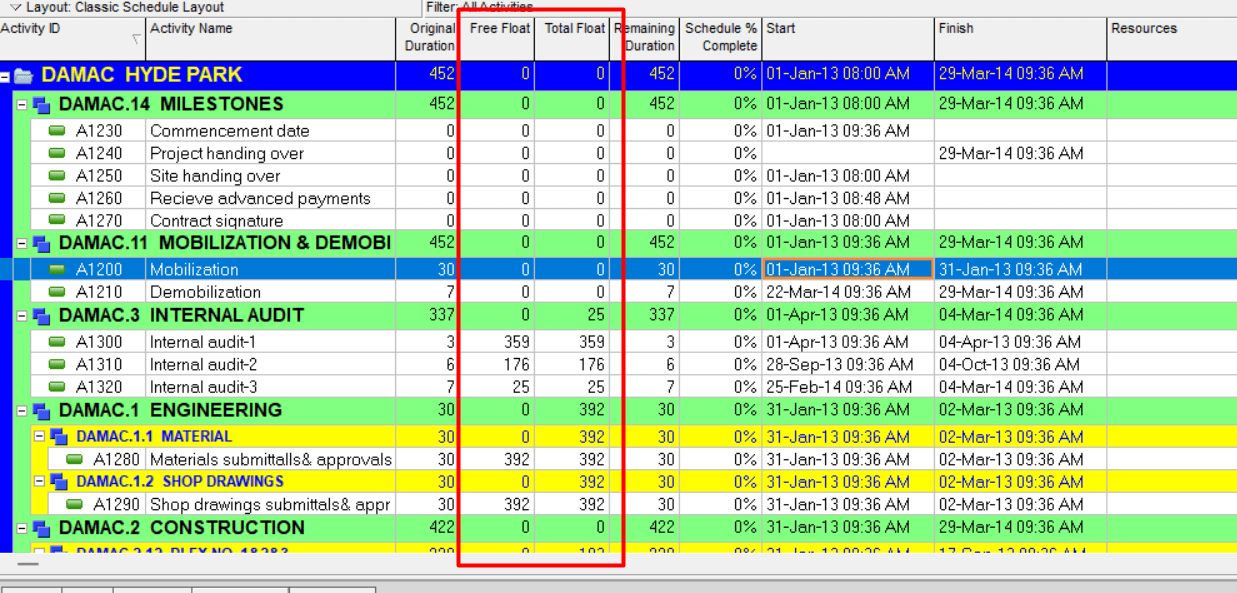
Now you can see that both columns are shown in the schedule in the place we chose. If you want to change the place of any of them or want to hide or show any other column you have to make the same steps.
For More about How to Reduce Float check this article.
You may also consider our full breakdown guide on floats here.